Saturday, February 26, 2011

Red Velvet Whoopie Pies

I have been drawing inspiration from many of the shop blogs in which I have been purchasing my fancy baking supplies from. One of my favs is Bake It Pretty! They posted this recipe the other day, and like them...this was my whoopie pie adventure. It was a pretty simple recipe, but I did run into some problems of other sorts.....
The batter was pretty thick and snapped off one of the whisks. :( 

I used my X-large closed star frosting tip to pipe the frosting in the middle of the pies.

This puppies are sooooo scrumdiddlyumptious!!!! Thinking I will be making them again in a few weeks for our girls day at Canvas and Cocktails! 


Ingredients

For the Cookies:

  • 1 ounce semisweet chocolate, chopped
  • 1/2 ounce milk chocolate, chopped
  • 12 tablespoons unsalted butter, melted
  • 1/2 cup sour cream
  • 2 large eggs
  • 1 1/2 teaspoons apple cider vinegar
  • 1/2 teaspoon vanilla extract
  • 1 tablespoon red food coloring
  • 2 1/4 cups all-purpose flour
  • 1 cup granulated sugar
  • 1/4 cup unsweetened cocoa powder
  • 2 teaspoons baking powder
  • 1/4 teaspoon baking soda
  • 1/2 teaspoon salt

For the Filling:

  • 8 ounces cream cheese, at room temperature
  • 3 tablespoons unsalted butter, at room temperature
  • 2 1/2 cups confectioners' sugar, sifted
  • 1 vanilla bean, halved lengthwise and seeds scraped

Directions

Make the cookies: Preheat the oven to 375 degrees F. Line 2 large baking sheets with parchment paper. Combine the semisweet and milk chocolate in a microwave-safe bowl and microwave at 50 percent power until melted, about 2 minutes. Whisk until smooth.
Whisk the melted butter, sour cream, eggs, vinegar, vanilla and food coloring in a bowl until combined. In another bowl, whisk the flour, sugar, cocoa powder, baking powder, baking soda and salt.
Add the flour mixture to the butter mixture in four equal batches, whisking each batch completely before adding the next. Stir in the melted chocolate.
Scoop heaping tablespoonfuls of batter onto the prepared baking sheets and smooth the tops with a damp finger. Bake until the cookies spring back when lightly pressed, 8 to 10 minutes. Let cool 10 minutes on the baking sheets, then transfer to racks to cool completely.
Meanwhile, make the filling: Beat the cream cheese and butter with a mixer until smooth. Beat in the confectioners' sugar and vanilla seeds. Sandwich a heaping tablespoonful of filling between 2 cookies; repeat with the remaining cookies and filling. Refrigerate 30 minutes before serving

From foodnetwork.com


Crunchy Shrimp with Toasted Couscous and Ginger-Orange Sauce

Michael and I are trying to get ready for our honeymoon in Hawaii (don't judge...better late than never,) so we are on a "healthier" food kick! Last weekend, we bought a ton of fresh fruit and vegetables and then had our fridge die on us. Since my husband is so awesome, it is up and running just like new and I am back in business! :)

Found this recipe from Cooking Light:

Crunchy Shrimp with Toasted Couscous and Ginger-Orange Sauce

Ingredients

  • Sauce:
  • 1  cup  orange juice
  • 1  tablespoon  chopped fresh cilantro
  • 2  tablespoons  reduced-fat mayonnaise
  • 1 1/2  tablespoons  fat-free, less-sodium chicken broth
  • 1  teaspoon  grated peeled fresh ginger
  • 1  teaspoon  fresh lime juice
  • 1/2  teaspoon  ground cumin
  • 1/4  teaspoon  salt
  • 1/4  teaspoon  ground red pepper
  • Couscous:
  • 1  cup  uncooked couscous
  • 1 1/2  cups  fat-free, less-sodium chicken broth
  • 1/2  cup  orange juice
  • 1/2  teaspoon  salt
  • 1/3  cup  chopped green onions
  • 2  tablespoons  sliced almonds, toasted
  • 1  tablespoon  unsalted butter
  • Shrimp:
  • 20  jumbo shrimp, peeled and deveined (about 3/4 pound)
  • 1  large egg white, lightly beaten
  • 1/2  cup  panko (Japanese breadcrumbs)
  • 1  teaspoon  chopped fresh cilantro
  • 1/2  teaspoon  grated peeled fresh ginger
  • 1/8  teaspoon  freshly ground black pepper
  • 1  tablespoon  canola oil
  • 2  cups  trimmed watercress

Preparation

To prepare sauce, bring 1 cup orange juice to a boil in a small saucepan over medium-high heat; cook until reduced to 1/4 cup (about 10 minutes). Remove from heat; cool completely. Stir in 1 tablespoon cilantro and next 7 ingredients (through red pepper); set aside.
To prepare couscous, place couscous in a large nonstick skillet over medium-high heat; cook 3 minutes or until toasted, stirring constantly. Add 1 1/2 cups broth, 1/2 cup orange juice, and 1/2 teaspoon salt; bring to a boil. Remove from heat; cover and let stand 5 minutes. Fluff with a fork; add onions, almonds, and butter, stirring until butter melts. Keep warm.
To prepare shrimp, combine shrimp and egg white in a large bowl, tossing to coat. Combine the panko, 1 teaspoon cilantro, 1/2 teaspoon ginger, and black pepper in a large zip-top plastic bag. Add shrimp to the bag, and seal and shake to coat.
Heat oil in a large nonstick skillet over medium-high heat; arrange shrimp in a single layer in pan. Cook 2 minutes on each side or until done.
Place 3/4 cup couscous on each of 4 plates; top each with 1/2 cup watercress and 5 shrimp. Drizzle each with 1 1/2 tablespoons sauce.
I used brown rice couscous for more vitamins and fiber!
This was definitely not a tiny kitchen friendly recipe! I had mixing bowls, pots, pans, and ingredients all over the kitchen. Michael came in the door from work and said, "You used all that to make this???" It was tricky but I made it happen. However, because I was running around the kitchen trying to find this and that....I do think I may have over-cooked the shrimp a little bit. It was still very yummy! The sauce was AMAZING I loved that it was sweet, yet spicy....and the couscous had a slight nutty flavor thanks to the almonds.

      
Also used whole wheat Panko! 


We paired our meal with a 2008 Bodegas Salentein Killka Malbec!

Up Next....Red Velvet Whoopie Pies and Denver Restaurant Week stop #1, TAG! 

Wednesday, February 16, 2011

Valentine's Day At Home

I was so excited to celebrate our first Valentine's Day as a married couple! At first, we had reservations at a wine bar here in town, but then as it got closer we decided to stick with our yearly tradition.....making dinner together at home! With Denver Restaurant Week approaching, we have always waited to do our dining out until the end of February (yes, I will be documenting our 5280 week excursions!) 
 
Michael and I love Tony's Market! We try to limit our meat intake, or what has been had termed as being "a Flexitarian;" so when we do decide to enjoy a nice steak, we head over to visit our friends there. For Monday's dinner we picked out some nice think New York Strips. MMMmmmm! And of course, since we stopped there I also had to pick up one of my favorite indulgences, DRY Lavender Soda.
Since we were going all out, I wanted to make Twice-Baked Potatoes for Michael. I found a very delicious looking recipe from Emeril Lagasse for Overstuffed Twice-Baked Potatoes that looked too good to pass up.

  • SERVINGS: 4
  • MAKE-AHEAD

Ingredients

  1. 5 large Idaho baking potatoes (about 1 pound each)
  2. 1 tablespoon olive oil
  3. 1 3/4 teaspoons salt
  4. 1/2 teaspoon freshly ground white pepper
  5. 4 ounces bacon, chopped
  6. 2 cups shredded sharp cheddar cheese (8 ounces)
  7. 1 cup sour cream
  8. 4 tablespoons unsalted butter, at room temperature
  9. 2 tablespoons snipped chives

Directions

  1. Preheat the oven to 400°. Line a large baking sheet with aluminum foil.
  2. Rub the potatoes with the olive oil and season with 1/2 teaspoon of the salt and 1/8 teaspoon of the pepper. Put the potatoes on the baking sheet and bake until fork-tender, 1 hour to 1 hour and 10 minutes. Let the potatoes sit until cool enough to handle.
  3. Cook the bacon in a medium skillet over moderate heat, stirring occasionally, until crisp and the fat is rendered, 5 to 6 minutes. Drain on paper towels.
  4. Peel 1 potato completely, discarding the skin. Place the pulp in a large bowl. Cut the top quarter from each of the remaining 4 potatoes and using a spoon, scoop the pulp from the potatoes into the bowl, leaving a 1/4-inch layer of pulp on the skin. Return the potato shells to the baking sheet.
  5. Using a handheld masher, mash the potato pulp until smooth. Add 1 cup of the cheese, the sour cream, butter, bacon, chives, and the remaining 1 1/4 teaspoons of salt and 1/4 teaspoon plus 1/8 teaspoon of pepper and mash until smooth. Spoon the potato mixture back into the potato shells, top with the remaining cheese and bake until hot and the cheese is melted, about 15 minutes. Serve hot. 
I used BacUns instead of bacon....they taste the same and are much healthier!

A little appetizer of some french cheese, 34* Crispbread (another favorite), strawberries, and even some bubbly helped tide us over while everything was cooking.


I like to keep the steaks pretty simple. Our favorite way is to rub them with a little bit of olive oil, and mixture of garlic salt, chile powder, pepper, parsley, and even a small pinch of red pepper flakes. Mike grills them to perfection, too...he is amazing! :)
 
It was a perfect way to celebrate our new little family! I love my husband and my two baby boys, Dodge and Diesel. Feel so blessed to have them in my life!
 

Saturday, February 12, 2011

Proscuitto and Goat Cheese Pizza

After a snowy hike today, pizza sounded like a dream....however, Pizza Hut is not going to help my Hawaii ready figure.....so I whipped up one of my favorite homemade pizzas instead:

I started by baking the proscuitto at 400 degrees to make it nice and crispy:

Bumping the oven to 450 degrees....I then coated the pizza crust with a light coat of olive oil,  pasta sauce (I prefer using Muir Glen's if I'm not using homemade,) and added chucks of goat cheese and prosciutto. Next, I covered with a layer of fresh mozzarella and basil. Then I turned the oven down to 425 and baked for 10 minutes.
Yummy!
We pair our pizza with High Desert Malbec

Wednesday, February 9, 2011

Extra Large Frosting Tube

Just a quick Thursday night post....

I had lots of baking to do tonight and had just ordered a new baking "toy" that I couldn't wait to try out! I know I have shared my new favorite website with some of you, but for those have not heard....Etsy.com has become my new best friend! I found this fun XL Frosting Tube on CupcakeSocial's Etsy store.
I absolutely love this seller! Especially, the cute paper straws that I will be purchasing soon. :)

I had a second go at the Red Velvet Cheesecake (but still only used 2 TB of red food coloring...4 just seems like too much) and I was thrilled with the end result after using the frosting tube with the whipped cream.
I even had a little left over for a yummy dessert....fresh blueberries and whipped cream!

MMMMMMMmmmmmm!

Saturday, February 5, 2011

Peanut Butter Cookie CUPCAKES!

Having and OMG moment!!! These things are not a "little" slice of heaven, but a "HUGE" slice of heaven! Everyone knows I have quite the obsession with cupcakes, and what is better than a peanut butter cookie inspired one!


When I think about my childhood, I always come across the same memories of my dad's peanut butter cookies. I think it is just because he never planned on baking them......a craving just set in and he'd announce that he was making them. Of course, we'd all be happy to help eat them! In fact, he is the one that got me in the habit of eating a spoonful of PB right out of the jar. :)

Thank you Martha for the recipe!

  • FOR THE CUPCAKES
  • 1 3/4 cups all-purpose flour
  • 3/4 teaspoon baking powder
  • 1/2 teaspoon salt
  • 1/4 teaspoon baking soda
  • 3/4 cup (1 1/2 sticks) unsalted butter, softened
  • 1 1/3 cups sugar
  • 2/3 cup natural, creamy peanut butter
  • 3 large eggs
  • 1/2 teaspoon pure vanilla extract
  • 1/2 cup sour cream
  • FOR THE FROSTING
  • 12 ounces cream cheese, room temperature
  • 1 1/2 cups confectioners' sugar, plus more for decorating
  • 3 tablespoons unsalted butter, softened
  • 1 1/2 cups creamy peanut butter

Directions

  1. Preheat oven to 375 degrees. Line 3 standard 12-cup muffin tins with paper liners.
  2. Make the cupcakes: Whisk flour, baking powder, salt, and baking soda in a medium bowl. Put butter and sugar into the bowl of an electric mixer fitted with the paddle attachment; mix on medium speed until pale and fluffy. Reduce speed to low. Mix in peanut butter. Mix in eggs, 1 at a time, and vanilla. Add flour mixture; mix until combined. Mix in sour cream.
  3. Spoon scant 3 tablespoons batter into each muffin cup. Bake until pale golden and a cake tester inserted into centers comes out clean, about 13 minutes. Transfer to wire racks; let cool completely.
  4. Make the frosting: Put cream cheese, confectioners' sugar, and butter into the clean bowl of a mixer fitted with the clean paddle attachment; mix on medium- high speed until pale and fluffy. Stir in peanut butter with a rubber spatula.
  5. Spread 1 1/2 tablespoons frosting onto each cupcake. Refrigerate until frosting is firm, about 10 minutes. Using tines of a fork dipped in confectioners' sugar, score each top in a crosshatch pattern. Cupcakes can be refrigerated in single layers in airtight containers up to 2 days.
From Martha Stewart Living, January 2006

Read more at Marthastewart.com: Peanut Butter Cookie Cupcakes - Martha Stewart Recipes

This recipe lies! It only made about a dozen and a half cupcakes, but enough frosting for two and a half dozen....so it looks like I will be making more later on today. 
I have more self control than I thought! This batter was so light and fluffy it looked more like frosting, could have eaten it all!

I ended up using Sunflower's Crunchy Natural Peanut Butter; simply, because that's what I had. It doesn't seem to have as many peanut chucks as others and it turned out fine.

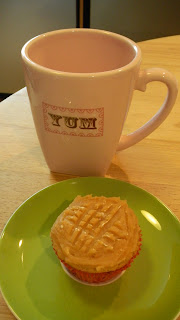
Perfect breakfast treat with a cup of Jamaican Joe.......


Thinking that the folks from Winestyles will be getting a little "Thank You!" for being so generous last night. Yummm!

Wednesday, February 2, 2011

Red Velvet Cheesecake Turned Pink Velvet Cheesecake


I have been wanting to try this recipe out for awhile now. With temperatures -20 degrees outside and home because of a  "Cold Day" from school, I thought it was only appropriate to declare today a baking day. Out to the store I headed to pick up a few ingredients (little did I know I was risking my fingers of frostbite) and then back at home I wasted no time getting started:
 My mother and sister-in-law bought me this cute apron from Anthropologie!

I adapted my recipe from The Culinary Chronicles:

Red Velvet Cheesecake
From Southern Living
Ingredients:
Crust:
1½ Cups Chocolate Graham Cracker Crumbs or Chocolate Wafters
¼ Cup Unsalted Butter, melted
1 Tablespoon Granulated Sugar
Filling:
24 Ounces Cream Cheese, softened
1½ Cups Granulated Sugar
4 Large Eggs, lightly beaten
3 Tablespoons Unsweetened Cocoa
1 Cup Sour Cream
½ Cup Buttermilk
2 Ounces Red Food Coloring

Fresh Whipped Cream:
1 Cup Heavy Cream, chilled
1 Tablespoon Granulated Sugar
1 Teaspoon Pure Vanilla Extra
Stir together graham cracker crumbs, melted butter, and 1 tablespoon granulated sugar; press mixture into bottom of a parchment paper lined pan. Bake crust for 6-7 minutes at 325 degrees. Cool completely.
Beat  cream cheese and 1½ cups granulated sugar at medium-low speed with an electric mixer. Add eggs and the rest of the listed ingredients, mixing on low speed just until fully combined. Pour batter into prepared crust.
Bake at 325° for 10 minutes; reduce heat to 300°, and bake for 1 hour and 15 minutes or until center is firm. Run knife along outer edge of cheesecake. Turn oven off. Let cheesecake stand in oven 30 minutes. Remove cheesecake from oven; cool in pan on a wire rack 30 minutes. Cover and chill 8 hours.
Prepare  whipped cream. In a stand mixer, whisk the heavy cream on high until it just holds stiff peaks. Slowly sprinkle in sugar. Add vanilla. Pipe the whipped cream on top of unmolded cheesecake.
ENJOY!


 Oops....first mistake, I didn't plan for all that red food coloring and only ending up with 1 TB so TAHHDAHHH...Pink Velvet Cheesecake!
  The amount in the recipe allows for two pies; so instead, I started with one pie and then decided to make individual servings for the remaining mix:
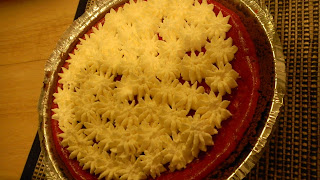
I chose to use homemade Cream Cheese Frosting on the pie instead of the the whipped cream. 
 We paired our cheesecake with one of our favorite wines right now, Westside Red Troublemaker, which is a Syrah, Mourvedre, Grenache blend. The cheesecake really brought out the mocha flavor in the wine. It was a perfect way to end such a cold day and I loved how the bottle matched the cakes!